Cada día ofrecemos un programa licenciado GRATIS que de otra manera tendrías que comprar!
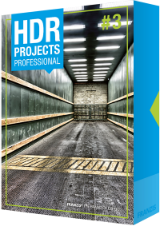
HDR projects 3 Pro (Win&Mac) estaba como Giveaway el día n 22 de enero de 2017
Lanzado originalmente en 2012, los proyectos HDR han llevado la fotografía HDR a un nuevo nivel. Smart Colorspace Adaptation (SCA), un desarrollo único y totalmente nuevo de la línea de proyectos, determina un espacio de color individual e inteligente para cada paso calculado. Esta capacidad permite una mejora elemental de la vivacidad de los colores primarios, con una gradación de color más fina y distinta.
- Nuevo: Convertidor profesional más profesional de la favorable-liga para todos los formatos CRUDOS;
- Nuevo: ahora presets 81 para resultados profesionales más rápidos;
- Nuevo: Ahora con 10 algoritmos de cálculo de mapeo de tono para la libertad más creativa posible;
- Nuevo: Ahora con 72 filtros de gama alta para apariencia creativa e imágenes listas para imprimir.
Si es usuario de Mac, descargue el archivo de instalaciónaqui (65.7 MB).
Tenga en cuenta que no podrá solicitar la clave por segunda vez con la misma dirección de correo electrónico, por lo que si tiene problemas para recibir la clave, pruebe la alternativa.
The current text is the result of machine translation. You can help us improve it.
Requerimientos del Sistema:
Windows 7/ 8/ 10; Mac OS X (10.7 and higher)
Publicado por:
FRANZIS Verlag GmbHPágina Oficial:
https://www.projects-software.com/hdr/hdr-projects-3-professionalTamaño del Archivo:
77.5 MB
Precio:
$89.00
Mejores Titulos

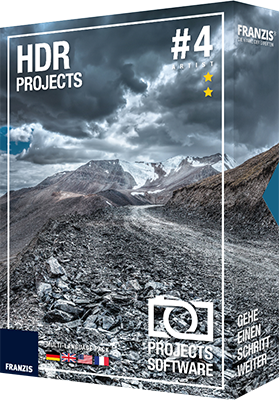
Once you have seen HDR images, normal images will just seem boring. HDR projects 4 enables you to generate very precise lighting situations that are not possible with “normal” photography or photo editing. The leading process for super realistic images with unbeatable contrast and detail that you have never seen before! Special price for GOTD users: get HDR projects 4 Pro for only $20 instead of $198!


Comentarios en HDR projects 3 Pro (Win&Mac)
Please add a comment explaining the reason behind your vote.
Here's what I wrote last time around, with minor updates, in case it's of any use... oh and it's a really handy piece of software which I'd recommend.
It's a bit of a pain to register but persevere and you'll get there.
Oh, if anyone reading this doesn't know what HDR is, it stands for "High Dynamic Range" and is usually used to combine differently exposed photographs of a scene to end up with an image capturing a greater range of brightness than the camera can. The classic example is being in a dark room looking out on a brightly lit scene. The camera can show the detail in the room, with the Window solid white, or the detail outside the window but everything in the room is black. But taking a set of (typically three) exposure-bracketed (standard, brighter, darker) images of the scene you can then combine them in some HDR software and have room and outside both visible in the picture.
You can either combine multiple images into an HDR or just select a Raw file (if you have one) and work from that (it won't be as good, but a fair bit better than the JPEG).
The Projects software is a set of (basically) stand-alone photographic processing tools, they do install as Photoshop plugins, but under File->Export, not as Filters, which IMHO doesn’t really count.
With the HDR software in today's give-away you have an additional step beyond just opening a photograph, you have to select the images to combine and choose some options. I was very pleased to see it has support for Raw file import, although as a 2015 program I don't know how it will do with the very latest cameras (but see at the bottom for a solution to this).
Once you’ve imported the images (i.e. clicked on post-processing) it works in basically the same way as the other Franzis Projects software. Here’s what I wrote as a quick-start guide before and it’s generally applicable to the HDR software.
The thing to get your brain around with the Projects software is they are a huge pile of image processing tools, which are gathered together into presets in the left pane. All those options do is select a bunch of processing tools and choose options for them, so they are infinitely tweakable.
After you've loaded the image(s) you want to work with you can then play with the canned effects on the left side, play with assorted things on the right side panel (which should start on the “Finalise” tab). Changing to "Expert" in the right panel you can add filters from the list at the top, select them in the middle of the panel and tweak their effects at the bottom (may need scrolling down). The boxes at the top of the left panel filter the effects that are listed in the panel, so ignore them initially. On a faster computer you can use the Eye icon on the toolbar to disable the preview mode and show the final image in the main window, which IMHO is worth doing.
When saving the final image note that the first dialog, where it asks for the title, is going to write that over the image, it isn't the file name. The main disadvantage is the lack of Undo operations.
I literally spent 90 seconds working on an image and was really quite pleased with the result. If you don't mind the learning curve and fancy playing with HDR I'd recommend it.
...
Oh, and to add raw support for more recent cameras download this (if you're running 64-bit Windows):
http://transfer.franzis.de/projects/RawImageDllprojects_Win64.zip
and replace C:\Program Files\Franzis\HDR projects 3\FreeImage.dll with the dll file it contains.
If you're not running the 64-bit version of Windows, i.e. your computer doesn't have a directory "C:\Program Files (x86)" then the file you want for upgraded raw support in 32-bit Windows is: http://transfer.franzis.de/projects/RawImageDll_projects_Win32.zip
If you have a Mac you'll need to get the OSX version of FreeImage from SourceForge and replace the existing one, wherever it might be. Oh and note you want the link from where it says "If you are a Mac user please download the installation file here (65.7 MB)" above, not the big green Download button.
Save | Cancel
On attempting to access the developers website (via the link above)I get :
"Your connection is not secure
The owner of www.projects-software.com has configured their website improperly. To protect your information from being stolen, Firefox has not connected to this website."
...... and this on two different machines running two different OS's.
Save | Cancel
Previous offer of version 3 elements has these features:
6 professional HDR algorithms
40 Presets for masterful images in landscape, nature, monochrome, architecture, surreal and artistic settings
Intelligent optimization assistant for sharpness, tone values, clarity and noise removal
Fully automatic alignment for exposure series taken without a tripod
High end ghost image removal for moving subjects
Supports all current RAW, TIFF and JPEG formats
HDR effects also possible with only one image
Includes scratch and sensor spot corrector
Current offer of Pro version:
13 different HDR algorithms
Individually weight each exposure
Selective exposure and HDR weighting with HDR Painter
Highly precise alignment for crisp exposure series results
Fully automatic high-end ghost image remover – also manually useable in extreme situations
Professional pro-league RAW converter for all RAW formats
81 presets for faster professional results
10 tone mapping calculation algorithms for the most creative freedom possible
72 high-end filters for creative looks and print-ready images
Area corrector for sensor spots
Save | Cancel
On attempting to access the developers website (via the link above)I get :
"Your connection is not secure
The owner of www.projects-software.com has configured their website improperly. To protect your information from being stolen, Firefox has not connected to this website."
...... and this on two different machines running two different OS's.
Thanks but no thanks
Save | Cancel
Many thanks GotD for this software, I know I will find it useful as I got a spiffy new camera for Christmas and am experimenting extensively with HDR photography! I already had the regular HDR Projects 3 from here (from May last year) but the Pro version looks more full featured. I'm very pleased with this offer and the results from a quick test with it just now are impressive.
For those wondering how to install this is how I managed it - unnecessarily complicated and fiddly but I got there in the end after about a quarter of an hour...
1. Click Download link above (Mac users: there is a different link for you above). I don't have a Facebook a/c so I selected the email link option. Fill in your email address and wait for first email.
2. First email: contains link to download the software. Download to your PC.
3. Unpack zip, read the text file if you like and start the installer...
A registration type of panel pops up with an "Internet button" - click this first.
4. The "Internet" part of the install procedure requires you to enter your name, address, email and a password. This appears to be in order to setup an account of some kind. You HAVE to agree to getting newsletters too.
NOTE: If you have already registered an email address for an earlier version of the software (as I had) then you need to provide a different email address, unless you have an online account already, which I didn't.
5. Submit this info and wait for a second email.
Check your spam folder if you don't see this and/or add registration@post.franzis.de to your whitelist. This 2nd email contains a link for you to confirm/vaildate your email address for the account you just created.
Once validated wait for a third email...
6. The third email FINALLY contains a User ID and registration code!
7. Go back to the waiting program installer. Fill in your ID and code. The program can now be installed.
When it fires up for the first time you have to enter the registration code for a second time before you can get in.
8. That's it. Done!
9. Make yourself a nice cup of tea and relax - after this song and dance you will need it. ;-)
I hope this helps someone, or at least gives an idea of the process. It's a bit tortuous but it broadly went off without a hitch for me. Good luck!
Save | Cancel